I have a very sweet tooth. It’s not a good thing, since sugar tends to make me squirly. (Although I am assured by my fans that it’s most amusing to watch!). I love chocolate. I loved fudge. I love condensed milk.
Fortunately, my allergies have been a strong deterrent. The sugar makes me squirly, as I’ve mentioned. Dairy does unkind things to my complexion, and the combination does both, with a side order of twitchy headache. It’s a good thing, because without symptoms I’d be gigantic. In fact, part of me is convinced that God got tired of trying to answer my prayer for will-power, so He gave me allergies instead. Effective.
Until today.

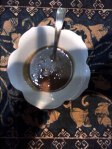
Dairy-free condensed milk. Toffee-like and delicious.That’s because a simple and poorly-intentioned Google search revealed the key to dairy-free desert nirvana: a simple recipe for making your own condensed milk! Oh wow. So I made some. Since I was experimenting with ingredients, I made less than the recipe suggested, but I will confess that as I write this, scarcely two hours since I started the experiment, there’s precious little of the gooey, toffee-coloured deliciousness left.
The original recipe can be found
here, but this is what I did.
(Heads up: this is an easy snack, but not a quick one).Ingredients
- 1 litre dairy-free milk. I used soya milk, although I imagine rice or almond milk would work too.
- 1 cup granulated sugar -greatly reduced from the recipes I found online (can also use brown sugar). I totally used thick treacly sugar for this … *sigh* … Next time I might xylitol or even, if I’m feeling particularly adventurous, stevia.
- 1 tablespoon butter (Optional – to thicken the milk). I used margarine. I might omit this next time.
 Thick and gooey and ickily sweet. Yumm.Method
- In a heavy-bottomed pot, bring the milk and the sugar to a boil over medium heat.
- Reduce the heat to low and simmer very gently for about two hours (yeah, I know..) until the volume is reduced by half. The mixture should be barely simmering and never bubbling at any point. Stir every 15 minutes or so to keep the milk from forming the “skin” on top. I forgot to stir and the milk burnt slightly and turn yellowish instead of remaining white. The original author said this but I did the same thing, so I’m leaving it in.
- After 2 hours, stir in butter.
- Remove the pot from heat and let the milk cool. The mixture will thicken further after it has cooled. Try HARD not to eat the fresh, hot condensed milk. It does scald, although the sheer bliss masks the symptoms for a bit.

