Monday, September 17, 2012

Porridge!

Edible Harmony's awesome-looking apple pie energy bars: how they're supposed to look.
This weekend, after we'd been to a very damp (read: monsoon-engulfed) farmers' market and liberated what we could from the smattering of soggy stalls that were open, Aunty Em came round and made these. She substituted sunflower seeds, sesame seeds and linseeds for the nuts, because we're still not convinced about the safety of nuts. They were delicious and we will certainly be making those again!

This morning I valiantly attempted to replicate the recipe. The fact that we had virtually none of the ingredients in no way deterred me from my quest. Unfortunately, the lack of ingredients was a significant deterrent to the success of the recipe. Instead of solid, chewy, brownish bars, we got off-grey sludge. With bits in it. Hmm ...

I tried firming "them" up in the fridge. If anything, that made matters worse. So I tried baking the jolly things. The only differences now were a roasty-brownish colour, and elevated temperature (predictably). So, mother being the necessity of invention and all that, I plonked it into bowls, poured honey on top, and called it "porridge". It was delicious, and even the notoriously picky Red Riding Hood wolfed hers down and declared it delyummy! (Which is a good thing).

So if you're feeling adventurous and you need something - anything - besides eggs for breakfast on a dairy-free SCD diet, here's the porridge recipe we tried. Let me know if you experiment with anything similar.

Porridge Ingredients
2/3 cup sunflower seeds
1/2 cup raisins (or more, to taste)
Honey to taste (we used at least 1/2 a cup)
1 tsp cinnamon
1/2 tbsp coconut oil
Salt (I swear it!)
2 ripe bananas

Method
Keeping the seeds in a cup, pour liquid over them to just cover them. (I used brewed coffee, but I think a good tea, juice or even water would work just fine).
In the morning, turn the seeds out into the blender, then add all the ingredients.
Purée until "porridgey".
Line a small baking tin with baking paper, and empty the blender into the tin.
Bake at about 180°C (roughly 350°F, I think) for about 20 minutes, until it's golden brown. (I always use the smell test: if it smells ready, check it: it probably is ready).
Serve the goop into bowls and top with honey if you want to (it's very sweet). Yoghurt or your choice of milk would also be very nice, although it actually doesn't need anything at all.
Enjoy!

Just a note: this can be made into a very low GI, diabetic-friendly breakfast by omitting the raisins and subbing the bananas for a sugar-friendlier fruit. Have fun experimenting!


Tuesday, September 11, 2012

Sweet for my sweet, sugar for my honey?

We highly recommend the honey at the Farmers' Market - both The Bee Guy (Scrumpy Jack's Honey) and the Dairy place (Mortenson's Honey) have great tasting, pure raw honey.

Saturday, September 1, 2012

Spring is Sprung!

It's been a glorious day in the Upper Highway and what better way to start Spring than a sunrise run (with the full moon slowly setting), followed by a trip to the Shongweni Farmers' Market. Seriously, if you live anywhere within 50km (or more if you're adventurous) of Hillcrest, just west of Durban, you really need to head out to The Market on Saturday mornings. Fresh organic produce, decadent desserts, happy dogs, adorable children, friends, and super finds. Not to mention a range of options for your steaming hot morning cup o' Joe. We love it!

Today's goodies included organic raw honey for use in chocolate cookies, biltong for snacks (oh I love biltong!), organic free range meat from Hope Meats, and a delicious selection of veggies. The gem squashes in particular were absolutely delicious! Even the kids enjoyed them.

To celebrate, when I got home I made Chocolate Covered Katie's 3 Ingredient Chocolate Bars. We used honey instead of stevia, and shape moulds instead of a simple plastic dish. I think the honey needs to be melted a little first, but the end result was certainly not unpleasant. Happy Days :)

Next up: crustless quiches for Tea Sunday at Church tomorrow. Excited!

Thursday, August 30, 2012

Spaghata Nadle! (Spaghetti Noodle Substitute)


If you're a fan of blogs and you have a sense of humour, you've probably seen Allie Brosh's wonderful Hyperbole and a Half. We love pretty much everything she posts, although we really hope she finds her way through her current trials. It's amazing how you kinda get to know someone through their blog, and their pain can sometimes feel as personal to you as your friend's or sister's. Get well soon, Allie!

Anyhoo, one of our all time favourite posts themes (for reasons as yet unfathomed) was the Spaghata Nadle. We found it absolutely hilarious, and applicable to virtually any situation you face. I won't elaborate - check it  out for ourself

Again, I don't know why this should be, but for some reason this dinner ingredient always makes me think of spaghata nadles. Perhaps because it's so very almost like spaghetti noodles ... but not. Here's what we do instead of spaghetti noodles for bolognaise and meatball dishes:

Zucchini Noodles 

(Courgettes if you feel fancy (or French); baby marrows if you're from the East Rand originally. Don't worry, we won't judge.)

Ingredients
Lots of baby marrows/zucchinis/courgettes
garlic
Salt
Olive oil for sautéeing

Method
Wash and peel the courgettes.
Grate or peel them into long, thin slices (this takes practise).
Heat the oil until it is about medium hot.
Add the courgettes and let them brown for a few minutes.
Add salt and garlic to taste.
Stir occasionally.
Keep checking on them until they just start to turn light brown on some of the edges.
Serve them hot on their own or topped with bolognaise sauce or meat balls. Or anything you like, really.

Delicious.

Wednesday, August 29, 2012

Delicious VEGAN chocolate mousse - packing a secret antioxidant punch!

The year before last we attended a GREEN Tasting evening. Everything was organic, from the coffee to the meat to the cheese to the wine - even the packaging! It was a wonderful evening hosted by The Big Green Directory, and we were amazed at the range of GREEN options available, not to mention how reasonably priced everything was.

Our favourite items that evening were the Moroccan Lamb sausage from Hope Meats (also available on Saturday mornings from our farmers' market. Brilliant!), and the chocolate mousse. Well, naturally.

The reasons we loved loved loved this mousse were:

  • It's packed full of antioxidants (from the cocoa and the secret ingredient).
  • It's vegan (we're not, but we're sympathisers. As long as there's biltong, I'll never be vegan).
  • It's free of bad fats and full of good ones.
  • It tastes AMAZING.
  • You don't have to stop eating it for any reason - except the clang of the bottom of the bowl hitting your teeth, of course!
So, without further ado, and with permission from the incredibly clever and inspired Rolene of RAWLean, here's the solution to your chocolate cravings:

RAWLean's Delicious Vegan Chocolate Mousse

Ingredients:
  • 2 ripe avocados
  • ½ cup organic raw cacao powder (most health stores will have this)
  • ¼ cup agave nectar (check sweetness to taste)
  • ½ vanilla pod or 2tbs vanilla extract
  • 1tbs coconut oil
  • Seasonal berries

Method: 
Blend all ingredients in a food blender until smooth. Allow to set in the fridge for one hour. Serve in a wine glass with seasonal berries for garnish.

Tuesday, August 28, 2012

Chocolate Cookies!!

Yes, I know. Not one but two exclamation marks. It's a crime against grammar and a grievous assault against the English language. All I need to do now is reformat this entire post in Comic Sans and we'll know that The End is upon us.

However, the hyperpunctuation is not without merit. Because today I discovered .. wait for it ... SCD cookies! Delicious, easy, quick and perfectly legal if you overlook SCD's aversion to chocolate. In my not-at-all-humble opinion, modern research says a lot about the anti-oxidant properties of cocoa and how good it is for your heart.

But frankly, a single, poorly researched, dubiously funded sentence in a throw-away trash-mag would be more than enough to convince me to make one small SCD concession because, let's face it, I'm never giving up chocolate.

Today I stumbled across this recipe. I adapted it as detailed below and I must admit that the results have been consumed utterly. Not even a crumb to mark the passage. So much of yummmm ...

Sugar-free, dairy-free, flourless CHOCOLATE cookies

  • 3/4 cup of organic raw honey (or more to taste), slightly softened
  • 3 egg whites
  • 15 drops of pure vanilla extract
  • a pinch of teaspoon salt
  • 3/4 cup cocoa powder (or less - this is a very strong taste. Heaven).

Preheat the oven to 175°C. Beat all the ingredients together until the result is a smooth, frosting-like heavy cream that is virtually impossible not to devour. Drop teaspoonfuls onto a greased or parchment lined baking sheet (grease the parchment) (I didn't grease the paper and the cookies did stick a little bit. I was forced to chew the remnants off throw away the excess).  Bake for about 12-15 minutes, depending on how crunchy you want them - longer =  crunchier. Place on a wire rack to cool (if you can help yourself).

Monday, August 27, 2012

Organic food and other options

The more we read about the various disorders linked to Tourette Syndrome, ADD and the like, and how many people find relief from the symptoms of these through diet changes, the more we discover that food from organic sources comprises a vital component of the process.

A lot of people find it hard to find organic produce, and even when they do, it is often prohibitively expensive. This light relief provides a little insight into the true cost of "going organic"; however, it's easy to be smug when we live just a few km from one of the best fresh produce markets in the country (imnsho).

The Shongweni Farmers' and Craft Market.
What a great place. We go every single Saturday (vehicle permitting). This week we first had a short 3km run, followed by witnessing an absolutely spectacular sunrise. At the market by 7am, we found all the fresh produce and organic meat we needed - all locally produced - and even shared a cup of absolutely wonderful Assagay Coffee with our pastor.

Sadly, our favourite yoghurt seller had either left already by the time we arrived, or didn't come at all. But we did get organic honey, chicken and minced beef, as well as a wide selection of delicious vegetables - including some of the best beetroot I've ever tasted.

We love organic, and we love local!

Saturday, August 25, 2012

Spotlight on Gluten

Today I went to a fascinating talk on living the low carbohydrate lifestyle, presented by Lucille Cholerton. It was an interesting look at this new lifestyle that we've adopted (from a slightly different angle). I learnt a lot and met some great new friends who are on a similar journey. It was lovely to connect with folks who really "get it", and to be able to offer some information and support, too.

Lucille is a gluten counsellor and author.
From Amazon.com:
Lucille Cholerton is a specialist in gluten sensitivity and coeliac disease. She and her three grown children all suffer from gluten sensitivity. Read her story in Spotlight on Gluten: New symptoms for the new millennium? Or long-standing symptoms now being recognized? 

She says, "Age is very pertinent to the subject of gluten sensitivity. This disorder should really be diagnosed in childhood, but if the diagnosis is missed, people can suffer for many years with unexplained symptoms, when something that they are eating every day could be the root cause of their ill health." 

This book covers the symptoms that Cholerton and her children suffered, and how they improved their health dramatically on a gluten-free diet. The author's research spans twenty years. "In my research I discovered that gluten may be responsible for many autoimmune disorders, of which there are some eighty-eight documented. My doctors knew nothing about this, so I really had to be my own "guinea pig." 

A former teacher, Lucille Cholerton is now a nutrition counselor and is writing her next books on gluten sensitivity. "There is a dire need for better diagnosis and understanding of this disorder." She is married and lives in Durban, South Africa. She started the Gluten Intolerance/Coeliac Support Group in Durban in 1995. 

For more information about gluten, visit http://www.allergysa.org . Publisher's website: http://sbpra.com/LucilleCholerton Author's Website: http://spotlightongluten.com


Wednesday, August 22, 2012

Coconut Butter

Yesterday I told you how awesome Chocolate-Covered Katie's vegan chocolate fudge is. Well, here's how to make the key ingredient, Coconut Butter. Trust me, this will revolutionise your baking, cooking and eating life!

Coconut Butter Recipe

Ingredients


  • Coconuts
  • Coconut Oil

Method


  1. Take the hair off the coconut.
  2. Pierce the eyes and drain the coconut.
  3. Wrap the coconut in a towel and beat it with a hammer until it shatters. (This bit is immensely satisfying!)
  4. Pry the coconut flesh out of the shell, then carefully cut off the brown skin outside of the coconut flesh.
  5. Use a juice extractor to get the coconut milk out of the coconut flesh (Hmm, coconut milk. Sooo good in cocoa!)
  6. Lightly toast the coconut in a pan, over a low heat. Toast until just brown.
  7. Once the coconut has cooled, blend it in a food processor until smooth.
  8. Add coconut oil and blend until it looks like coconut butter - smooth and creamy and awesome.


Coconut butter is great as frosting on cakes and cupcakes, spread on bread or toast, or eaten from the jar! (Assuming it makes it into a jar). You can use coconut butter to make the fudge yesterday, or as an ingredient in baking, in the place of nut butter or flour.

Tuesday, August 21, 2012

FUDGE!

We LOVE Chocolate-Covered Katie. Pretty much everything on her blog is awesome and we've tried all of it! Well, all the things we're allowed, anyway. An Aunty Em permanent favourite is the vegan sugar-free chocolate fudge. Ever since we started down the gluten-free/dairy-free/sugar-free road we've tried to create a substitute for fudge, one of the few things we could never replicate. However, thanks to Chocolate-Covered Katie we now have the perfect solution with the added virtues of good health and veganism (selective, you understand).

 We've been battling to get the coconut butter in this recipe perfect, but today we had a major breakthrough (which I will post about tomorrow). The result was awesome, delicious, smooth fudgey heaven!

Chocolate-Covered Katie's Sugar-free Vegan Chocolate Fudge

Ingredients


  • 4 tbsp coconut butter (see tomorrow's post)
  • 1/2 a large very ripe banana
  • 1/4 tsp cinnamon (optional)
  • Pinch of salt
  • 2 tbsp cocoa powder*
  • 2 tbsp honey* (or to taste)

Method


  1. Make sure your coconut butter is melted before use. (Freshly home-made coconut butter is smooth and soft already but sets if left for a while). 
  2. Combine all ingredients in a small blender (or double the recipe for a bigger blender).
  3. Smooth the fudge into a plastic container or chocolate molds. (Katie says plastic containers work well because it's so easy to pop the fudge out once it's set).
  4. Refrigerate until set, then cut up and serve (or gobble!).

Yummmm .....

* Always, wherever possible, use pure, raw organic ingredients.

Monday, August 20, 2012

Coconut Flour Brownies

These brownies are cakey and delicious - hard to stop eating! I'm sure they'd be great with the marshmallow frosting, too.

Coconut Flour Brownies

Ingredients

  • 1 cup of dessicated coconut
  • 4 eggs
  • 2 bananas
  • 1tsp vanilla extract (NOT essence)
  • 3 tbsp honey (or more, to taste)
  • 1/2 tsp bicarbonate of soda
  • 1 tbsp lemon juice or apple cider vinegar
  • 3 tbsp cocoa (or more, to taste)

Method

  1. Heat the oven to 180C.
  2. Lightly toast the coconut until just golden.
  3. Blend the toasted coconut until very fine.
  4. Grease and line a square baking tin (the baking paper is important, otherwise it sticks).
  5. Blend all the ingredients except the lemon juice/vinegar in the blender until smooth.
  6. Add the vinegar/lemon juice and blend some more.
  7. Pour the mixture into the baking tray and bake for about 25 - 30 minutes, just until a skewer comes out clean. These should be a little moist.
  8. Cool slightly then chop into squares and serve.


Sunday, August 19, 2012

Chicken Banana Fritters

I know it sounds a little weird, and it took me a while to get my head around the idea, but these are actually delicious. The texture provides a useful and pleasant change in SCD, and this can be a good way to disguise eggs if your kids don't like them but aren't allergic. Plus they work well for any meal of the day! And they go far.

SCD Chicken Banana Fritters

Ingredients


  • Four chicken pieces, broiled (we used drumsticks)
  • Four eggs
  • Two bananas
  • Salt to taste

Method


  1. Blend the ingredients together in a blender until smooth.
  2. Heat a little oil in a pan (we recommend Olive Oil or Coconut Oil).
  3. Drop spoonfuls of the batter into the hot oil.
  4. Lightly brown on both sides.
  5. Salt to taste (optional).
  6. Serve.


Yum!


Saturday, August 18, 2012

SCD Birthday Cake

For Papa Bear's birthday the girls insisted that we should "let them eat cake!". So we did. It needed to be frosted, apparently, so we MacGuyvered a solution for that, too. We're so smart.

Here's how we did it:

SCD Pecan Nut Butter Cake with Marshmallow Frosting

Adapted from Grainfree Goodies' Nut Butter Bread recipe.

Cake Ingredients

  • 1 cup of pecan nut butter
  • 6 tbsp of raw honey (or to taste)
  • 3 eggs
  • 1/2 tsp bicarbonate of soda
  • A pinch of salt
  • Cinnamon and ginger to taste (optional)
  • Finely chopped dates (optional)
  • 1 tablespoon of lemon juice or apple cider vinegar

Cake Method

  1. Preheat the oven to 175°C.
  2. Line a cake tin or small loaf tin with baking paper.
  3. Blend all of the ingredients except the vinegar/lemon juice. (I used a blender).
  4. Add the vinegar/lemon juice and blend thoroughly.
  5. Bake for about 45 minutes, or until a skewer poked into the cake comes out clean.
  6. Remove the cake from the oven and immediately turn it out onto wire racks to cool. Remove the paper from the sides as soon as you can otherwise it might flop.
  7. Allow to cool.

Marshmallow Ingredients

(original recipe)

  • 10g gelatin
  • 1/4 cup ice water
  • 1/4 cup raw honey (or to taste)
  • Pinch of salt
  • 1/2 tsp pure vanilla extract (not vanilla essence - #Lethal)

Marshmallow Method

  1. When the cake is cool, chill a large bowl and the beater attachments from your electric beater in the fridge for at least a few minutes.
  2. Pour half of the water and all of the honey and salt into a small pot and bring it to a gentle boil.

At the same time ...

  1. Dissolve the gelatin in the rest of the water in the chilled bowl.
  2. Slowly pour the hot honey into the gelatin, beating gently.
  3. When all the honey is in the bowl, increase the speed and beat the mixture thoroughly.
  4. When the mixture resembles the soft-peak meringue stage, add the vanilla extract and beat some more. 
  5. Be careful: after this it sets quickly. 
  6. Beat the mixture until it reaches the "marshmallow fluff" stage.
  7. Pour it over the cool cake and leave it to set.
  8. Cut and serve


I think this would make a great Christmas treat: use a cake tin shaped like a hill. The brown cake looks like a mountain and the white marshmallow makes perfect snow. 

Friday, August 17, 2012

SCD Lasagne that packs a Carotenoid Punch

This month is birthday month in our household, with our two most severe ADD sufferers both advancing a year within a few days of each other. To celebrate, I always let them choose their favourite meal for supper on The Day. For some reason this year everyone has chosen lasagne. I blame Garfield!

This was no problem back in June when Red Riding Hood had her birthday, when we were gluten-free and dairy-free, but not SCD in any way, having never even heard of it. In fact, only I was gluten- and dairy-free, and my beloved wasn't free of anything at all!

However, fast forward to August where we're free of everything and both Papa Bear and Goldilocks have ordered lasagne! What's a girl to do? Why, make lasagne, of course. Here's how we did it:

SCD Lasagne

Lasagne sheets ingredients


  • whole, fresh butternut - NOT cubed or frozen (blegh!)

Lasagne sheet method

*This bit may need experimentation*

  1. Make sure you have a sharp knife.
  2. Peel the butternut thoroughly. Remove the hard bits at the top and bottom.
  3. Halve the butternut lengthwise.
  4. Now halve the round bottom half to expose the seeds.
  5. Using a table spoon, thoroughly scrape out every last seed and all the fibre around the seeds.
  6. Using ingenuity and skill (of which I have masses, naturally) slice the butternut into the largest, thinnest sheets you can. Actually, largest is less necessary than you'd think - about the size of the palm of your hand should do fine.
  7. Now, the first time I did this, I managed to get the slices very thin, so they cooked well inside the lasagne. The second time - not so much. If you have this problem, try gently roasting or even lightly boiling the sheets before you use them to soften them up. Hard butternut is both not SCD legal, and gross-tasting.

Do the sheets first otherwise it's a real schlepp.

White sauce ingredients


  • 1 cup of SCD yoghurt (don't sub any other kind - it's really not worth it)
  • 1/4 cup (or more) of water
  • 1/2 cup aged cheese (ours is four years old! I love the Farmers' Market for these kinds of things)
  • Half a cauliflower (obvs organic if you can, but you may have to take what you can get)
  • Salt and herbs to taste (I should have used garlic and basil, but made do with salt)
  • Extra cheese for on top

White sauce method


  1. Boil the cauliflower until it's tender (this took a while for us).
  2. Blend the cheese, yoghurt, water, herbs and salt, and some of the cauliflower in a blender. Gradually add more and more of the cauliflower until the consistency looks like what you'd expect from white sauce, and is very smooth. 
  3. You can also season it after you've reached the right consistency, to taste.

Meat sauce ingredients


  • 1 large onion
  • 500g minced beef (or any meat you'd prefer. Beware of "natural flavourings" in the ingredients. #Lethal)
  • Salt & garlic to taste
  • 1kg carrots (approximately 10 average-sized carrots), washed, peeled and chopped into discs
  • 1 bunch of beetroot, washed, peeled and cubed

Meat sauce method


  1. Heat a little oil in a pan (we recommend olive oil or, even better, coconut oil).
  2. Chop the onion finely and brown it gently in the oil.
  3. Add salt and garlic to taste (I always do it at this stage. Some people sweat against it, so go with what you prefer. This works for me).
  4. Add the mince and brown it thoroughly.
At the same time ...

  1. Steam the carrots until they are tender. I used a pressure cooker (brilliant!), but we sometimes use a pot with a little water, a microwave steamer, or even a bamboo steamer.
  2. Boil the beetroot until it is very tender.
  3. Mix the mince, carrots and beetroot together.

Compile the lasagne


  1. Heat the oven to 180°C.
  2. In an oven-proof dish, spoon half of the mince mixture. 
  3. Pour half of the white sauce onto the mince mixture.
  4. Arrange the butternut sheets on top of this to cover it as well as possible.
  5. Pour the rest of the mince sauce on top of the butternut sheets.
  6. Spoon about 2/3 of the remaining white sauce on top of the mince, and top with more butternut. You only need one layer of butternut at a time.
  7. Spread the rest of the white sauce as well as possible over the butternut, then top with as much cheese as you like.
  8. Cook, covered, until the butternut is tender when poked with a fork.
  9. Uncover it and grill for a few minutes, until the cheese bubbles and browns slightly.
  10. Serve it!

Serves 8


Thursday, August 16, 2012

SCD, Tourette's and Autism

I am reading a fascinating book called "Natural Treatments for Tics & Tourette's" by Sheila J. Rogers. The more we read about tics and Tourett Syndrome, the more we see a clear link between these disorders and our family. The fascinating thing for me, however, is how an elimination diet not unlike SCD could well yield tremendous results. More research is needed, but it looks like food and environmental factors could potentially play a massive role in treating our quirks. Even more reason to adopt a healthy, organic, sugar- and preservaive-free lifestyle!

The secret to amazing nut and seed butters

This is probably not news to any of you, but today I was delighted to discover the secret to smooth, delicious, easy-to-make seed and nut butters: lightly roast the nuts or seeds first! I think I read this online once (and as we all know, everything you read online is true!).

Today I roasted 2/3 of a cup of pecan nuts with 1/3 of a cup of sunflower seeds, then I zhoozed them in the blender with some sunflower oil (yes, I know.) and a little salt. It would have been even better with honey, but in the absence of that, it was still utterly delicious - and the perfect basis for my wonderful Nut Butter Loaf of Great Awesomeness.

Yet again, hyperconsumptionism has resulted in Photographic Evidence Deficit Disorder. My bad.

Wednesday, August 15, 2012

Butternut & Carrot Soup

This delicious soup was created by the eponymous Aunty Em herself and is delicious! We'd post pics but it's been eaten already. Maybe next time.

SCD Butternut & Carrot Soup

Ingredients

·         1 butternut
·         6-7 carrots
·         1 onion
·         1 chicken stock cube
·         ginger, cumin, paprika, cinnamon
·         salt to taste
·         peel of one orange

Method

·         Peel & chop veg.
·         Sauté the onions with the spices.
·         Add veg and stock dissolved in 1 cup of boiling water.
·         Add 1.5 litres of water.
·         Add peel.
·         Allow to simmer until veg is mushy.
·         Remove orange peel and blend or push through a sieve. (Try to remove onion for Intro and phase 1 of the diet).

Tuesday, August 14, 2012

Pecan butter

This evening I literally drooled on myself. An embarassing admission when one is just months away from middle age. Even so, it is true. The reason? Pecan Butter. I have been battling a bit with all the butters, but the simple additions of honey and oil made this delicious butter smooth and wonderful. I'll use it for baking a birthday cake tomorrow, and if possible take pics. The experiment might not survive the taste testers long enough to be photographed!

Monday, July 16, 2012

SCD, Here we Come!

Alright, we’re ready. On Saturday we went shopping and bought everything we need for the SCD Intro Diet. This is supposed to last for three days (give or take a day), and it cost us R164. That’s really, really good for three days for our family, so I think perhaps it won’t last as long as I’m hoping. But some of that stuff will last longer than three days, like the eggs, so we’ll see.

I spent most of Sunday (the bits where we weren’t at Church), preparing for the diet. I have given my family their “last meals.” (Pies and crisps. I know. Don’t judge me). I have cooked up a gigantic pot of chicken-and-carrot soup, 36 meatballs, 8 bowls of grape jelly and a dish of purèed carrots. I also have 40-odd eggs in the fridge, just waiting to be breakfast!

Now, I don’t know how long this lot is supposed to last, but it feels like about two days’ worth. Except the jelly – that’ll get us through today only. Again, we’ll see. The intro diet is supposed to take between two and five days, so we’ll re-evaluate on Tuesday night and decide what to do next. I foresee another full day of cooking in my future, though.

Here’s what I hope to achieve from all of this preparation:

  • Fewer headaches;

  • Fewer stomach cramps;

  • Better concentration;

  • Fewer mood swings;

  • Better skin;

  • Fewer allergic reactions;

  • Fewer nightmares;

  • Better sleep;

  • More energy; and

  • Better focus.

When I list these like this they really don’t seem that serious. One might even wonder why we’re bothering with such a strict diet and lifestyle change. But the thing is that the headaches are really debilitating at times, leaving the girls in tears and me wishing I could get away with tears! The girls spend a lot of time doubled over in agony at their stomach cramps (and their relief is our demise as they expel the offending bubbles. Sorry to share but this journey is important to me and I need to remember as much of where we started as possible so that when I look back I can see real change).

My skin breaks out all the time. It’s painful and decidedly embarrassing, given that I really am too old for this kind of thing. I’ve even had to cancel client meetings because of my skin (or headaches, or tummy troubles). Papa Bear and Goldilocks battle to concentrate and often Papa Bear’s not even here, despite being physically present. He also battles terribly with hay fever, and his hay fever, tiredness and tummy troubles have kept him out of meetings and appointments, too. Not being able to concentrate affects us all and I imagine things can only improve if we have better moods and better focus.

My vision for the outcome of this new eating plan is that we will have energy, joy, focus, time (because of better sleep and better planning), success (because of more confidence and fewer canceled appointments), and all-round awesomeness. I know the beginning is very tough indeed, and I don’t expect it to be easy, but I am looking forward to the long term results. I’ll keep you posted.

Thursday, July 12, 2012

Every one a coconut.

After the coconut milk had been made,  I still had no inclination to get to “work”, and besides, I was technically in the middle of home school. So while I listened to the girls reading, I made ice cream and macaroons.

The ice cream was a big hit and super easy:

  • 1 banana

  • 1 cup of coconut milk

  • as much vanilla essence as you like (or none at all – I used just shy of a teaspoon)

  • honey (I used aboout 1.5 tablespoons, and found it rather sweet)


Blend everything well in a food processor, then freeze. This amount of mixture made six ice lollies, and froze reasonably fast. It was delicious but I think next time I will take it out of the freezer and beat it a couple of times to get the crystals out. If chocolate was allowed on the SCD I would definitely dunk the ice lollies in melted chocolate. So much of nice.

The macaroons were less successful. I’ve made macaroons many times and while I’m no Daniela, they’ve always been edible and in most cases people ask for more.

Not today.

I think I hadn’t squeezed enough coconut milk out of the coconut, and I also substituted honey for sugar, so almost immediately my light and fluffy egg whites swirled into slightly separated strangeness. I thought a tablespoon of macadamia nut butter would help to reconstitute the mass into something that would sort-of hold together, but that was a mistake and I knew that before I even opened the jar.

It wasn’t all bad, because after 20 minutes of baking, the macaroons began to resemble the correct consistency. I let them cool, scraped them into a bowl, and formed the lot into 9 little balls. Baking these yielded something … well … something. But it’s edible. And you don’t need a spoon.

I won’t post the recipe until I have one that works.

Wednesday, July 11, 2012

So, why the coconut?

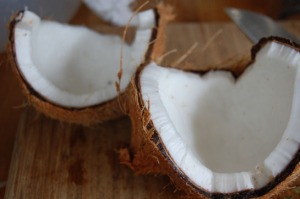
Cracked-open coconut. (Kimi’s, not mine).

Have I mentioned SCD? I’m sure I have and you’re probably like everyone else who knows me by now: over it! But whether or not you’re over it or you’ve never heard of it, it is fascinating and I can’t wait to get started. All I need to do is read the book, understand the book, and get started.

I have started reading the book, so I know that coconuts make up a big part of the diet. They are a good source of a lot of the things our bodies need, and easily digestible. Coconut milk can be used as a regular milk substitute. It can be turned into yoghurt, and used for smoothies and ice cream. The liquid inside the coconut is a valuable source of electrolytes and the flesh is delicious and multi-functional.

Empowered by all of this information and ready to act, I headed off to the green grocer and bought the first coconut I have ever personally owned. Nestled among the bananas (to make it feel at home), we admired it for a few days, then finally decided to depilate it on Monday morning. I had expected the process to take long, and I supposed it did, but not as long as anticipated. Removing the hairy husk was followed by driving a nail into the eyes to see if any liquid came out. It did not.

Next up was the extremely satisfactory process of hammering it open. I wrapped the coconut in a dish towel, took it outside, and holding it down firmly by the dish towel I hammered away with semi-gay abandon. It was fun. Highly recommended.

Once it was broken open, I faced the tedious task of scraping off the softish brown outside of the flesh with a sharp knife which, despite the element of danger, was rather dull. The blender served well to break the flesh into the recognisable consistency of dessicated coconut, though without so much of the dessicated. I really enjoyed discovering the thick, waxy white by product smeared on everything (not sarcastic, I promise), and used that to great effect in lieu of cooking oil for frying the onions I used for dinner.

Using the method I found here, on the wonderful Nourishing Gourmet blog, I made coconut milk. I thought it was delicious, and really enjoyed it in my coffee. It was a little thin, but I think that’s because of the ancientness of the coconut I’d bought, which had not even a drop of liquid inside.

Given the cost of the coconut, the labour involved, the sheer delight of hammering the thing open (which in my mind is worth the cost all by itself), the by products (“oil”, coconut pulp), and the health benefits of it all, I think this is a potentially worthwhile pursuit. I could have made more coconut milk by using more water. (I used two cups, then one cup, while the recipe suggests two cups, then two cups. That made 2.5 cups of coconut milk). I could also have squeezed the pulp harder to get more out, I later found, and I now know that I need cheesecloth. Is that stuff reusable? I should probably have let it stand in the water for longer too. Some people even simmer it gently, which I may try next time.

Tuesday, July 10, 2012

Coco Mojo

Yesterday was a good day. Full of energy and accomplishment, it was the kind of day I wish every day was. Having worked until nearly 2AM the night before, when I had put my house in order by 7AM, I was disinclined to do any billable work. (Funny, that). So instead I “supervised” the girls as they sorted out their room. This process was made both more and less difficult by their best friend spending the day with us. She helped a lot, but the three girls can never spend more than a few minutes together without collapsing in giggles, and I didn’t have the heart to unleash Mean Momma on their hilarity.

We only started “school” around 9:30!

"Stuart Little 3: Call of the Wild" has great special features, including an art lesson!

“Stuart Little 3: Call of the Wild” has great special features, including an art lesson!

BFF (Tinkerbell) was visiting because she’d begged her mom to let her come and try a day of home school with us. We started by hacking open a coconut*, moved on to reading, made coconut milk, studied the Bible, made coconut ice-cream, then took a break. After lunch Papa Bear helped them to make hovercrafts to study the effects of air pressure, then moved on to an art lesson. Since we’re currently looking at identifying the shapes within objects, we decided to use the “learn to draw” part of the Stuart Little 3 DVD for today’s lesson. We drew Snowbell and Reeko, but by Stuart we were pooped. Although Goldilocks was up to the challenge of creating the little mouse, and did a good job, too.

I made the left over “dessicated” coconut into arguably the worst macaroons in the world, although they were better after I rebaked them, having dried out a little the first time around.

Papa Bear played tag with the girls out front while I made supper. They laughed and played and frequently declared, “Daddy needs to be disciplined!” This out burst was followed by well-intentioned beatings with a miniature yard broom, rendered utterly jelly-like as a result of mirth-overdose.

Dinner was delicious, despite Tinkerbell’s absence (she’d already gone home), and everyone relaxed in front of an animated movie afterwards. *Bliss*.

Why can’t every day be like this?


*More on the coconut to follow.

Monday, July 9, 2012

Money Management and Real Food: lessons we can learn from both

Some years ago Papa Bear and I attended a Dave Ramsey Money Management course in our Church. It was great, and even though we’re only starting to implement the principles now (#1: emergency fund. Hmm..), we learnt a lot and it certainly affected our attitudes and perspectives.

This week I discovered a clever application of these principles in my research  into SCD (Specific Carbohydrate Diet), so I’m sharing it here. The article comes fromKelly the Kitchen Kop and the full post (and others) can be read here.
Dave Ramsey’s Money Principle #1:

  • Implement the Debt Snowball – Attack one debt at a time, the smallest first.  When that’s done, attack the next smallest debt.  Soon you’ll have gained the momentum you need to keep it going.


Kitchen Kop’s Real Food Principle #1:

  • Implement the Good Health Snowball – Start with one thing at a time so you’re not overwhelmed.  (You could go through these Rookie Tips.)  Change that one thing in your kitchen or in your diet, and when you’ve got that down, move to the next goal.  Soon you’ll have gained the momentum needed to keep you motivated for each next step!  (My Rookie class could help with this, too!)


Dave Ramsey’s Money Principle #2:

  • “Live like no one else so later you can live like no one else.” Drive beaters without payments, don’t spend money you don’t have, live within your means, save your money.  Then later when you’ve built up wealth, you can live like no one else.  You won’t be too buried in debt to have peace in your life.


Kitchen Kop’s Real Food Principle #2:

  • “Live like no one else so later you can live like no one else.” Don’t load up onsugar any old time you feel like it. (A good reminder for myself, too.)  Cook most of your food at home.  Don’t eat out for convenience sake.  Don’t keep processed foods around.  Then later when you’re in your 50’s or 60’s and haven’t been to the doctor in years, or you’re in your 70’s, 80’s and 90’s and still on the floor wrestling with your grand kids or out walking each morning pain-free, you’ll be living like no one else.


Dave Ramsey’s Money Principle #3:

  • Don’t be “normal”. Many may mock you for being “weird”, but remember that “normal” is broke and in debt.


Kitchen Kop’s Real Food Principle #3:

  • Don’t be “normal”. Many may mock you for being “weird”, but remember that “normal” is sick and tired.


Dave Ramsey’s Money Principle #4:

  • Don’t take advice from broke people.


Kitchen Kop’s Real Food Principle #4:

  • Don’t take advice from those whose advice has kept us sick.


Dave Ramsey’s Money Principle #5:

  • “The Borrower is slave to the lender.” (From the book of Proverbs.) Debt does not create peace in your life.


Kitchen Kop’s Real Food Principle #5:

  • The Truth will set you free.” (From the book of John.) Nutritional advice that makes common sense can free us from health issues that may have weighed on us for years or that could be right around the corner.  Good health can set you free to enjoy the life you’ve been given.


This week I’m starting SCD with my family, so I’ll let you know how that goes.

Wednesday, June 20, 2012

Kentucky-style grilled chicken

In my ongoing pursuit for health and happiness in the absence of masses of what the world calls “wealth”, I subscribe to like-minded blogs and try to apply what I learn as I go along. Today I got an email from ModernChristianWomen for the recipe below, which looks and sounds delicious! I’m definitely going to try this one, and I thought you might like it too.

KENTUCKY STYLE GRILLED CHICKEN


This is one of those unique recipes that you have to try to believe it’s good.  The ingredients are a very unique combination (in my opinion – I’ve never had anything like it before!) but the result is an incredibly savory, smokey grilled flavor.  You can use this marinade on both chicken and turkey – I haven’t tried it on pork, but I think it would be delicious!  I have also tried this on fresh corn on the cob…very good!  This recipe is a really nice change of pace from the more traditional BBQ chicken or Italian Dressing marinated chicken.  My family requests it often – and I think yours will too!

INGREDIENTS

  • 1 cup cider vinegar

  • 1/2 cup vegetable oil

  • 5 teaspoons Worcestershire Sauce

  • 4 teaspoons hot sauce (I use Frank’s)

  • 2 cloves garlic, minced

  • 1/2 teaspoon mustard (I used yellow, but feel free to experiment here!)

  • 2 teaspoons salt

  • 1/2 teaspoon sugar (or honey or your favorite sweetener)


METHOD

Combine all ingredients in a bow and mix well.  Add desired meat to 1 cup of mixture and let marinate for 4 hours.  Grill over medium heat for 20 minutes – turn and grill for 20 – 30 more minutes until juices run clear and meat is cooked through.  Baste occasionally with extra marinade. 

The total cost for this recipe is $.55 – pretty good deal!  I love that a few simple pantry ingredients combine to create an amazing meal! And the difference in cost between this recipe and a store-bought marinade is about $2.00.  GREAT savings!


First of all, I should admit that I have tried these kinds of flavour combinations before, so I know they work and taste awesome. Secondly, I have no idea how this recipe translates into rands. I’ll have to make it, calculate it, and update this post.

Enjoy!

Friday, May 18, 2012

We have a logo!

My darling daughters (DDs) and I have decided to resurrect my sister's business: a farmers' market-style stall selling baked gluten-free goodies. Home educating my girls has given us the opportunity to practise fun alternatives to learning. Baking has proven a good one on many levels, and now it seems that building a business together could well provide a very valuable source of educational opportunities.

Today we started with step one: Identity. (Yes, I know other people would approach it differently, but I am, after all, a graphic designer by trade). We already had the name: Aunty Em's.

Today DD#1 created her first logo - for this business. Here it is. Don't ya love it?

[caption id="attachment_10" align="alignnone" width="300"]Aunty Em's - DD#1's first official logo (age 9!). So proud. Aunty Em's - DD#1's first official logo (age 9!). So proud.[/caption]


Thursday, May 10, 2012

Oh the depth of wickedness I have plumbed!

I have a very sweet tooth. It’s not a good thing, since sugar tends to make me squirly. (Although I am assured by my fans that it’s most amusing to watch!). I love chocolate. I loved fudge. I love condensed milk.

Fortunately, my allergies have been a strong deterrent. The sugar makes me squirly, as I’ve mentioned. Dairy does unkind things to my complexion, and the combination does both, with a side order of twitchy headache. It’s a good thing, because without symptoms I’d be gigantic. In fact, part of me is convinced that God got tired of trying to answer my prayer for will-power, so He gave me allergies instead. Effective.

Until today.

Dairy-free condensed milk. Toffee-like and delicious.Dairy-free condensed milk. Toffee-like and delicious.That’s because a simple and poorly-intentioned Google search revealed the key to dairy-free desert nirvana: a simple recipe for making your own condensed milk! Oh wow. So I made some. Since I was experimenting with ingredients, I made less than the recipe suggested, but I will confess that as I write this, scarcely two hours since I started the experiment, there’s precious little of the gooey, toffee-coloured deliciousness left.

The original recipe can be found here, but this is what I did. (Heads up: this is an easy snack, but not a quick one).

Ingredients

  • 1 litre dairy-free milk. I used soya milk, although I imagine rice or almond milk would work too.

  • 1 cup granulated sugar -greatly reduced from the recipes I found online (can also use brown sugar). I totally used thick treacly sugar for this … *sigh* … Next time I might xylitol or even, if I’m feeling particularly adventurous, stevia.

  • 1 tablespoon butter (Optional – to thicken the milk). I used margarine. I might omit this next time.


Thick and gooey and ickily sweet. Yumm.Thick and gooey and ickily sweet. Yumm.Method


  1. In a heavy-bottomed pot, bring the milk and the sugar to a boil over medium heat.

  2. Reduce the heat to low and simmer very gently for about two hours (yeah, I know..) until the volume is reduced by half. The mixture should be barely simmering and never bubbling at any point. Stir every 15 minutes or so to keep the milk from forming the “skin” on top. I forgot to stir and the milk burnt slightly and turn yellowish instead of remaining white. The original author said this but I did the same thing, so I’m leaving it in.

  3. After 2 hours, stir in butter.

  4. Remove the pot from heat and let the milk cool. The mixture will thicken further after it has cooled. Try HARD not to eat the fresh, hot condensed milk. It does scald, although the sheer bliss masks the symptoms for a bit.


Tuesday, April 24, 2012

لذيذ! (Delicious!)

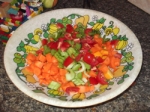
Bright and beautiful vegetables. So pretty.

I have no idea how to pronounce لذيذ but it is the Arabic translation of delicious (thanks, Google!). It’s appropriate for this post because it refers to the deliciousness of our Moroccan dinner this week. Enjoying cooking is a relatively new adventure for me, and thanks to the Internet, it’s possible – nay, easy! – to create virtually any concoction you can imagine. I had so much fun making delicious Moroccan Soup andHerby Flatbread(Click on the links – they’re worth a look and there are loads of other yummy things there, too).

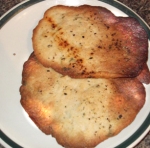
Flatbread. Should it be quite so brown?

What made it even more entertaining was being assisted by DD#2 as she began the journey towards domestic mastery for herself. She’s so entertaining and uniquely, innocently wise. What a joy! We peeled and sliced and diced and chopped and mixed and stirred and then cleaned it all away. She also made me a miniature garden from roses and celery leaves, and populated it with a Lego village and Lego characters. Considering the available space in our cosy cottage kitchen, that is quite an achievement.

Steaming stoup.

I so enjoyed the language style of the recipe writers: practical and unfussy and really doable. Of course, in true Me-style, I substituted what I needed with what I had. And garlic. In fact, I wrapped most of a bulb of garlic in foil, drizzled it in oil and herbs, and roasted it in the oven as an aperitif. *Sigh*. Perhaps next time DH will get some. I’m afraid this time (third night, third experiment, same outcome) I ate the lot. So much of hhmmm.

Garlic. Yum!

I managed to remember the camera before I had served the food, so here are some pics from the delicious event.


Souper Successful. Hur hur.

Tuesday, March 20, 2012

Gospel Gourmet.

Let me start by admitting that I’m exaggerating with the title here. This is neither Gospel, nor is it Gourmet. But it is food, and it was inspired by the Bible, so that’s got to count, right?  We’ll call it blogger’s license and leave it at that.

As we continue working our way through the unit on Trust, we’re studying the life of Elijah and how he clearly modeled faith in God. Konos recommends using well-written biographies of the characters being studied to help children learn about them in a deeper and more permanent way than a single paragraph on Wikipedia might offer. I’ve struggled to find good biographies that I can read to my girls as Family Reading books. Granted, I’ve only looked in our local library, and that could be the reason behind the struggle. However, I love to write. The girls both would like to write to some degree some day, and certainly need all the practise they can get. So I considered, and decided that if we wrote our own biographies, we’d learn so much:

  • Lots about the character in question.

  • Lots about the process of writing a story.

  • Lots about actually writing: grammar, spelling, sentence construction etc.


And I’d let them illustrate the books, of course, so there’s Art, too.

We’re starting with Elijah. Instead of a quick overview we’re studying his life in depth, making notes, creating spider diagrams … it’s fun! One of the stories we read this week was about Elijah staying with the widow who has only a small jar of oil and a handful of flour left before she and her son would expire. Elijah encouraged her to use that to make a cake – for him! And another for her and her son, of course. And he promised that the flour and oil wouldn’t run out, which it didn’t. I loved how Elijah trusted and obeyed God without question, and how the widow trusted and obeyed Elijah without question. In each case, they did not surrender their ability to reason, nor their autonomy and self-respect. They simply obeyed, and were immensely blessed for it!

Interestingly, we were in a similarly frugal state as I was reading that so I was inspired to try my hand at a similar kind of “cake” for the kids’ lunch. I cheated a it by adding a little milk, some water (there was a drought in the story, remember?), some herbs, salt, and a sprinkle of grated Parmesan cheese on top. (Yes, I do see the irony of having Parmesan in the fridge when we’ve used up the bread, but there were Extenuating Circumstances). I am hopeless at pancakes so I crafted some herby crumpets and the girls loved them! They really enjoyed seeing what the food could have been like, as well as just really enjoying the taste, too.

It actually led me to another train of thought about Bible food, but I’ll cover that somewhere else, I think.

The recipe is here.

Monday, February 20, 2012

Cost-cutting cuisine

For as long as I can remember I have loved healthy food and been fanatical about nutrition. I think two key things contributed to this in my formative years. The first was that my brother has cystic fibrosis and so a lot of our early years revolved around what he could or couldn’t do or eat, where he could or couldn’t go, and so on. We knew a lot more about healthy nutrition at that age than any of our peers.

Secondly, our family has a colourful and diverse range of allergies and intolerances, so growing up involved a lot of careful juggling around what would fill us, taste good and not kill us! (That’s an exaggeration, you understand).

In my adult years I have become heavily dependent on truly brilliant supplementsthat keep us healthy and well (not just “not sick”). So much so, in fact, that I even share these great supplements with anyone who wants them, and after seeing the phenomenal turn around in our family’s health, that list includes pretty much most of the people we know.

Even so, however, good nutrition is about more than just popping pills. It’s also about what we do put into our bodies, and what we don’t. That’s why I try so hard to feed my family good, balanced, nutritious, low GI meals and healthy snacks as much as possible. We usually have masses of fruit in the house, and if there are biscuits I try to keep them low GI, gluten free, dairy free ones. Where possible I replace sugar with xylitol or honey.

The more I think about it, the more it seems like it would be a good idea to share some of my adventures here, on my blog. I am no Nigella, and not even much of a run-of-the-mill domestic goddess. Most of my meals fail on presentation, but at least they’re USUALLY delicious and almost always nutritious. Not to mention being super-affordable, which is key right now.

Here’s tonight’s offering:

Pasta with Lentil Mush (title needs work; suggestions welcome).

Slowly heat red lentils with salt and Italian herbs until very soft. Drain.
Cook gluten-free pasta to taste.
Roast some vegetables in the oven. Broccoli and courgettes work very well for this, as do carrots and beans.
Finely chop a large onion and braise until soft and transparent/golden, then add 2 chopped tomatoes, a coupe of peeled and chopped carrots, some ginger and some garlic (to taste).Add the lentils and mix well. Mix in the roasted veggies (try to get some of their “veggie juice”, too – yummy!).
When this mixture is thoroughly smooshy, add some good quality tomato sauce (rich in lycopene, an essential antioxidant).
You may want a little more tomato sauce for the colour.
Serve the lentil mixture on the pasta – hot!

We added Nando’s hot chilli sauce for the grown ups because a) Chillis are a good source of capsaicin, which is good for nasal and chest problems, and induces feelings of happiness as a result of the release of endorphines, and b) We love it! The girls had their’s neat.

Everyone said it tasted great. DH even had seconds … I don’t know if he actuallyrealised he was eating lentils!

I’d share a picture but we ate it all, sorry about that :( .

The great thing about this meal is that it is full of goodness and low on cost. Seriously, we all have onions and lentils in the cupboard right? You can make anything with those two items alone. Kinda …

On a side note, don’t stint on tomato sauce. I know we’re all on budgets here, but a good tomato sauce is an awesome and worthwhile investment. The antioxidants are great for the whole family and many kids eat anything when it’s disguised in a tomato sauce super-hero cloak. The problem is that a cheap, synthetic tomato sauce is so bad for your family it would be better to feed the kids fries than to disguise broccoli in that swill.  I’m just saying.